
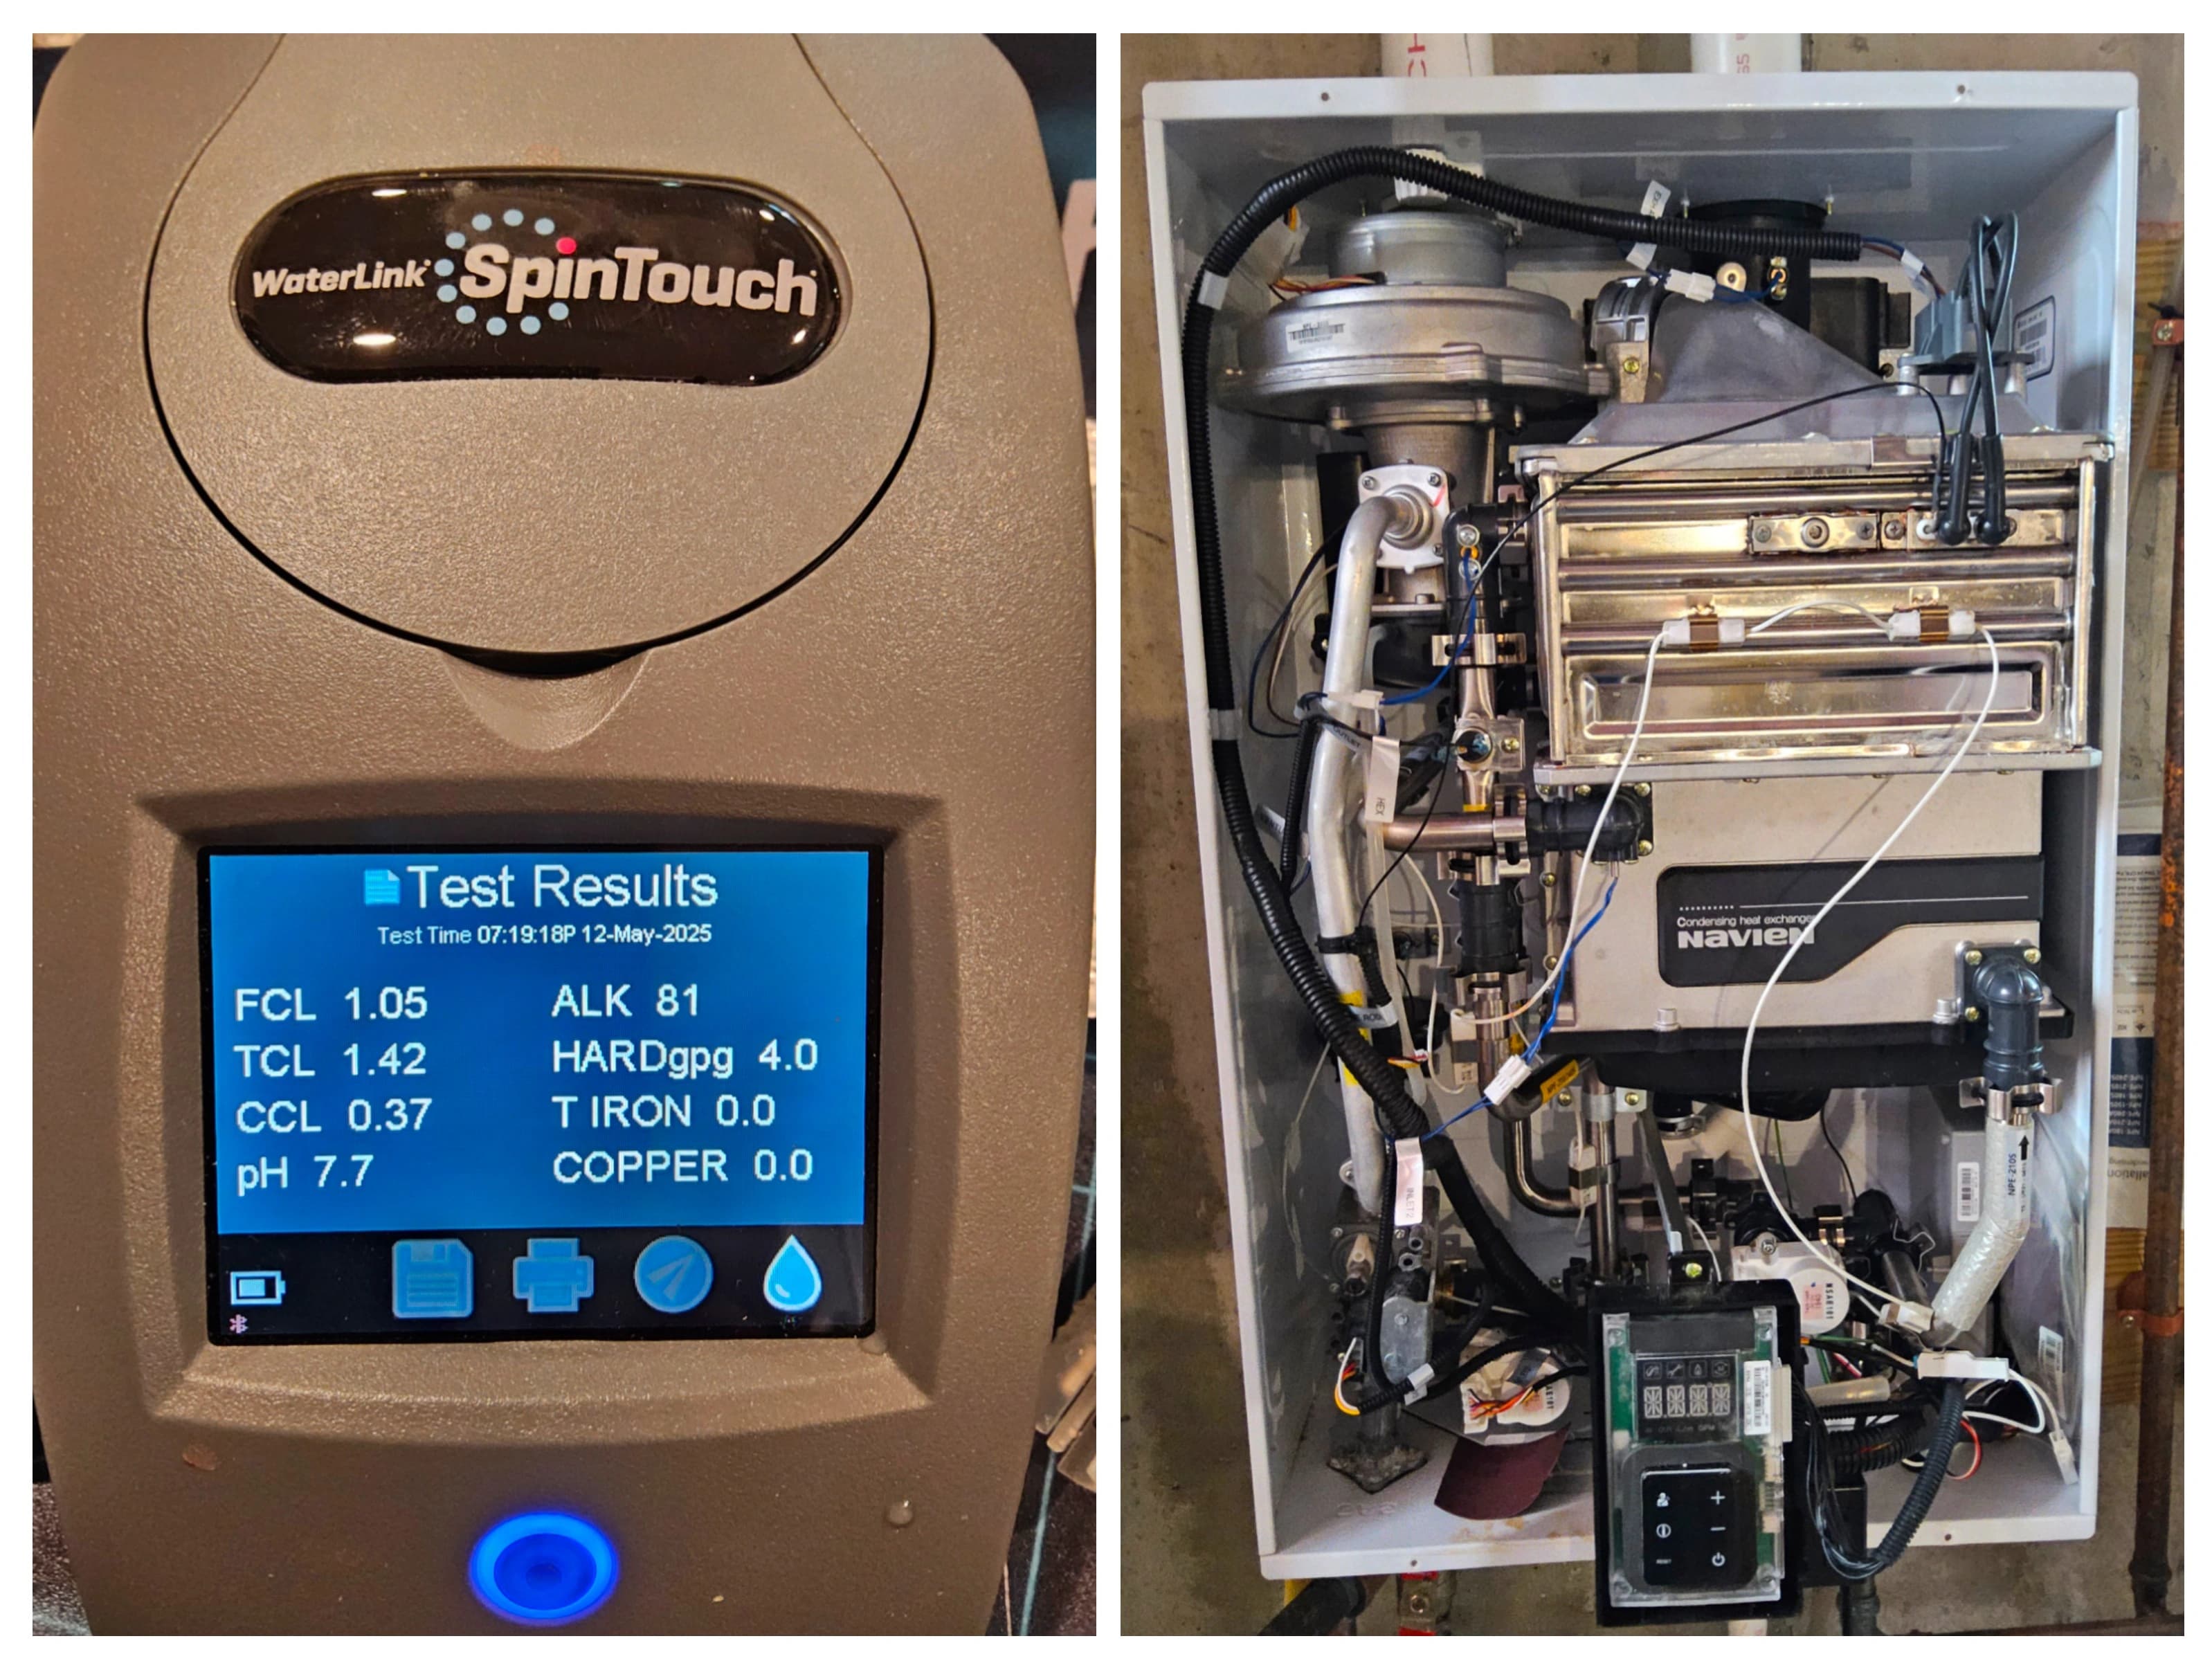
A Navien heat exchanger replacement is a major internal gas-appliance repair, and this documented Tyngsborough, MA case shows what the work involved. The source record follows the repair from isolation and disassembly through cleaning, reassembly, a water-side leak check, and initial startup. It is a useful case because it preserves the order of the work without turning a complex repair into a do-it-yourself guide.
The record says Jeneral Plumbing completed this Navien heat exchanger replacement, but it does not preserve the exact model, serial number, original error code, failure cause, written warranty decision, invoice, combustion readings, or long-term outcome. I therefore describe what the record supports and identify the testing a complete return-to-service process requires. For a broader overview of the equipment itself, see the tankless water-heater service guide.
Safety First: This Is Professional-Only Work
Navien heat exchanger replacement work requires opening a sealed gas appliance and may involve the gas train, burner, fan, electrical connections, water piping, vent collar, and condensate system. Do not remove the cabinet, connect service hoses, disconnect wiring, alter venting, or attempt an internal repair. Without an active hazard, a homeowner can photograph the full display and model information, stop repeated resets, and follow only the user-level shutdown direction in the exact homeowner manual.
If there is a gas odor or suspected fuel leak, everyone should leave immediately. Do not operate lights, switches, phones, appliances, windows, or shutoffs, do not plug in or unplug anything, and do not use flames inside; from outside, call 911 and the gas utility or propane provider, then stay out until officials clear the property. Carbon monoxide is odorless, so a sounding CO alarm, possible exposure symptoms, escaping flame, smoke, or fire also means leaving immediately, calling 911 from outside, and staying out until officials clear the property.
Why the Heat Exchanger Matters So Much
The heat exchanger transfers burner heat into the water flowing through a tankless heater. A Navien heat exchanger replacement reaches deep into the appliance because connected gas, air, exhaust, water, condensate, electrical, and control components surround it. Continuous hot water is available only within the unit's rated flow and temperature-rise capacity, and fuel savings depend on use, equipment, installation, and rates rather than the exchanger alone.
The source describes an early exchanger failure and a warranty path, but the exact unit age and claim eligibility are not preserved. Scale, unsuitable water chemistry, leakage, abnormal combustion, venting or condensate conditions, restricted flow, freeze damage, and a component defect are all possible failure branches in general. For this Navien heat exchanger replacement, none should be assigned to the Tyngsborough home without test evidence.
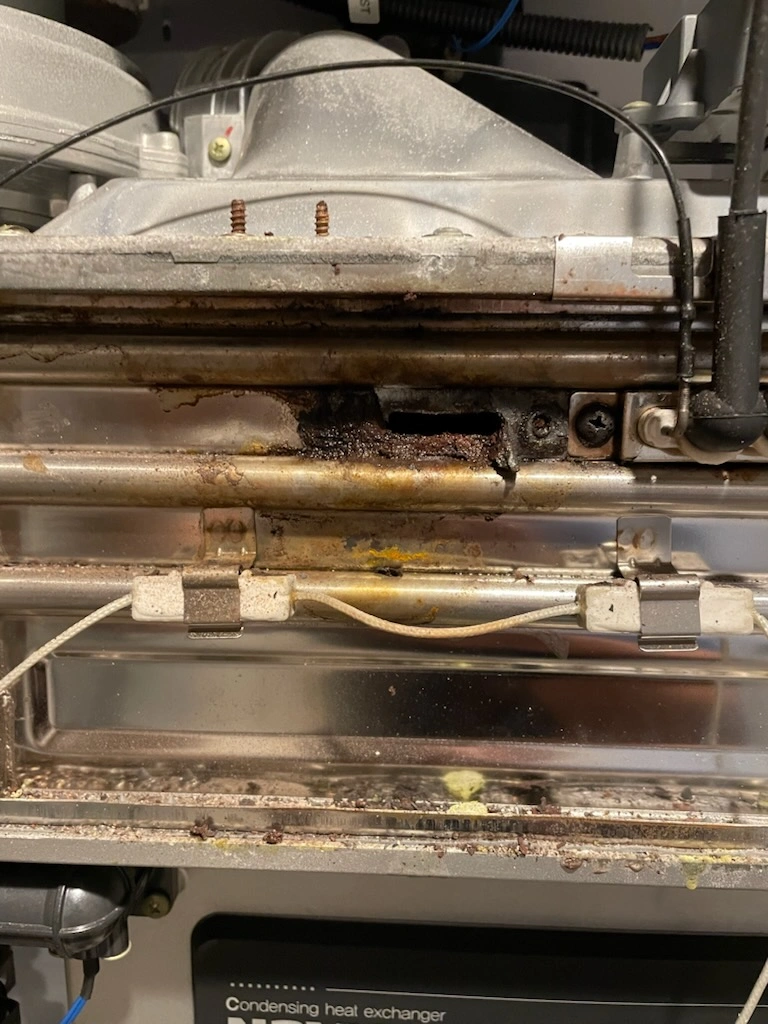
A failed heat exchanger
This Navien heat exchanger replacement made repair sense only after the component, surrounding condition, correct part, and proposed scope were considered together. A photograph or error code by itself does not establish the cause, warranty status, or best repair path.
Step 1: Why Isolation and Service Valves Matter
The documented Navien heat exchanger replacement began by using the valves below the heater to isolate and drain the water side. A typical tankless service-valve arrangement provides dedicated hot- and cold-water shutoffs plus hose or purge ports. Those connections let me isolate the appliance from the house piping, relieve pressure, drain it, and perform water-side service without draining the entire domestic system.
Service valves do not isolate gas or electricity, and their presence does not make Navien heat exchanger replacement safe for a homeowner. They are valuable service infrastructure, but they are not proof that prior maintenance occurred and they do not prevent component failure. If valves are missing, seized, leaking, incorrectly arranged, or inaccessible, the repair may require a broader water shutdown, more draining, or a compatible valve upgrade.
Before a Navien heat exchanger replacement, I verify the exact model and part information, allow the unit to cool, and follow its service procedure for electrical, fuel, water, pressure, and condensate isolation. That professional preparation controls residual water and stored energy while protecting the work area. The source confirms drain-down through the service-valve setup; it does not preserve every isolation test.
Step 2: Model-Specific Disassembly
Once the unit was isolated and drained, the record describes access through the gas train, wire harness, fan assembly, buffer-tank line, inlet side, and condensate connection. That list belongs to the recorded unit. The exact removal order, support points, fasteners, seals, and electrical connectors vary by model, so another Navien heat exchanger replacement must follow the verified service literature rather than this narrative.
During a Navien heat exchanger replacement, I photograph and label connections, support parts as they are removed, contain residual water, and keep seals and model-specific hardware organized. The goal is controlled access without placing weight on tubing, wiring, the burner assembly, or cabinet surfaces. I also inspect accessible harnesses, grounds, connectors, seals, ignition parts, fan and air path, water connections, vent collar, and condensate route for adjacent damage.
This is where a repair can broaden. Moisture, heat damage, corrosion, scale, a damaged seal, a vent defect, or a compromised connection may require separate diagnosis and correction. Navien heat exchanger replacement should not hide an unresolved condition behind a new component.
Step 3: Document the Repair
For this Navien heat exchanger replacement, the source records that the replacement date was written on the back of the casing where the exchanger mounts. The record does not establish that the marking location was manufacturer-approved, and this is not a universal instruction to mark every appliance. Labels, insulation, wiring, hot surfaces, combustion surfaces, and required markings should never be covered or altered.
A durable Navien heat exchanger replacement record is more useful when it includes the exact model and serial number, part information, service date, photographs, findings, relevant readings, customer-approved scope, and invoice. Warranty correspondence and return-to-service results belong with that record too. Good documentation separates what was observed from what was inferred.
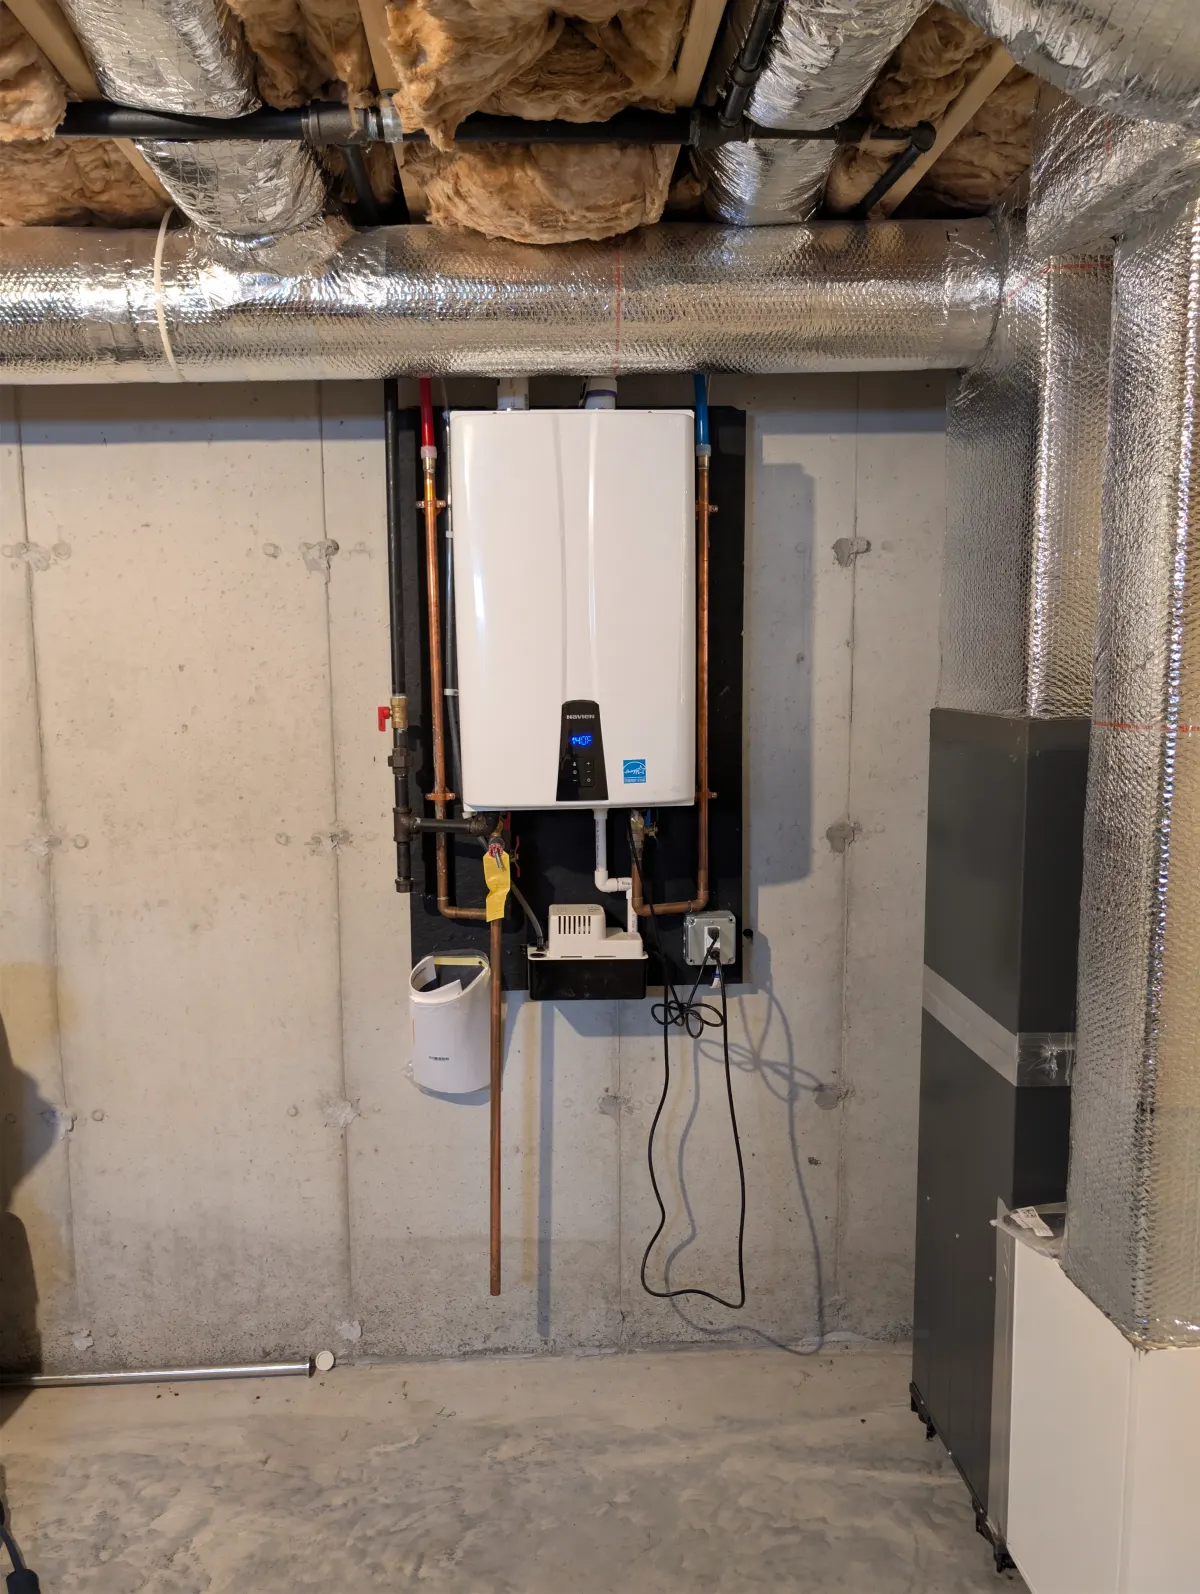
Finished Navien repair
The photograph is part of the case record, but it does not by itself document warranty approval or complete commissioning. Those conclusions require the written claim and test record.
Step 4: Inspect and Clean Accessible Components
During the documented Navien heat exchanger replacement, the source says the air-intake filter was cleaned, the cold-water inlet filter was inspected and photographed, and the condensate trap was cleaned and inspected. The notes described the inlet filter as not especially dirty and the condensate trap as heavily soiled. Those are case observations, not proof that either condition caused the exchanger failure.
Opening the cabinet creates access to components that are otherwise difficult to see, so I inspect and clean them when the model procedure and observed condition call for it. Clean surfaces can also make later moisture, residue, or damage easier to identify. The work should remain within the approved repair scope rather than becoming an unstructured parts replacement.
A water inlet or sediment filter captures certain debris; it does not remove dissolved hardness. Cleaning a filter or condensate trap also does not correct a vent defect, abnormal combustion, unsuitable water chemistry, damaged wiring, or a failed seal. A careful Navien heat exchanger replacement keeps those diagnostic branches separate.
Step 5: Install the New Heat Exchanger
Every Navien heat exchanger replacement requires the correct part, required new gaskets, seals, and O-rings for the verified model and manufacturer procedure. I inspect the mounting and sealing surfaces, support the exchanger during placement, align it without straining connected tubing, and secure it using the prescribed sequence and specifications. Reusing a one-time seal or improvising a generic fastener sequence can create a new leak or alignment problem.
Reassembly restores the applicable burner, fan, ignition, gas, water, wiring, ground, sensor, vent-collar, and condensate connections to their documented positions. The source preserves the broad component sequence, but it is not a service manual. Navien heat exchanger replacement requires a complete connection review before water, fuel, or power is restored.
The installation step is not merely disassembly in reverse. Seals can roll, wiring can pinch, grounds can be missed, and a water or vent connection can be placed under strain. I use the exact model literature and part instructions to control those risks.
Step 6: Leak Testing, Startup, and Commissioning
The Tyngsborough Navien heat exchanger replacement record says the water side was filled, no water leak was observed, the burner ignited and ran, and a faint rattle was noticed near the cold-side or mixing-valve area. It does not preserve an approved gas-leak-test result, combustion readings, firing-condition checks, safety-control results, or resolution of that rattle. I do not present the startup note as a complete return-to-service record.
After a Navien heat exchanger replacement, the professional sequence includes filling and purging the water side, checking water and condensate connections, and completing the approved gas leak test after any gas-path work. Intake and exhaust integrity, condensate drainage, wiring and grounds, ignition, flame proving, applicable safety controls, code history, flow, and delivered temperature also need to be verified. A new or unexplained rattle should be located and assessed before handoff.
Commissioning also includes calibrated combustion analysis at the model-required firing conditions and any applicable gas-pressure checks. The correct measurements and limits come from the exact Navien model and fuel procedure; there is no universal oxygen, carbon-dioxide, carbon-monoxide, or pressure target to publish for every unit. If a required result fails or a code returns, the appliance stays out of normal service until the cause is corrected.
The Lowell procedural guide gives a more detailed five-step view of isolation, disassembly, reassembly, leak checks, and commissioning. This Tyngsborough flagship keeps the focus on the documented repair sequence.
Step 7: The Navien Warranty Process
For this Navien heat exchanger replacement, the source describes a warranty path and says the removed exchanger was retained for return to Navien. It does not preserve written approval, a claim or part number, the exact coverage term applied to this unit, or the homeowner's final cost. Jeneral Plumbing's workflow is to define the proposed scope and obtain customer approval before coordinating a manufacturer claim; Navien determines whether the claim qualifies.
Navien's current residential heat-exchanger coverage runs 15 years for qualifying applications. Exact model, application, recirculation configuration, serial number, installation date, registration or proof, installation, maintenance, water conditions, current written terms, and Navien's decision govern. That is heat-exchanger-part coverage, not a 15-year whole-unit or labor promise.
A covered exchanger part does not automatically cover diagnosis, labor, shipping, access, seals, other parts, venting, gas, water, condensate, treatment, or correction of the underlying condition. Any manufacturer labor allowance, separately purchased extended coverage, or written installer coverage follows its own terms and approvals. Navien heat exchanger replacement proposals should distinguish those categories before work proceeds.
Jeneral Plumbing is owner-operated by a Licensed Master Plumber (MA #9628831-PL-M) with 20+ years in the trade, including 7 years with a gas utility. I am factory trained by Navien and Navien Service Specialist (NSS) certified. That training supports model-specific literature, diagnosis, documentation, repair, and commissioning, but it does not determine warranty eligibility.
Cost Context for Navien Heat Exchanger Replacement
The source contains no repair invoice, so there is no honest universal labor figure for this Navien heat exchanger replacement. Repair scope can change with access, isolation valves, adjacent damage, seals, connected vent or condensate work, warranty handling, and whether commissioning passes. Repair and installation work is priced at a flat rate, with the total price and any applicable fees disclosed for approval before work begins.
A complete condensing tankless installation costs $8,500 – $11,000+. That is replacement context, not an exchanger-repair quote. Compare a confirmed flat-rate repair with a property-specific replacement scope using equipment age, warranty status, parts availability, service history, surrounding component condition, water and venting evidence, current hot-water demand, and whether the repaired appliance can pass commissioning.
A covered part can make repair attractive, but age or warranty status alone does not decide. Replacement deserves a closer look when damage reaches other major components, key parts are unavailable, faults recur, the existing unit no longer fits demand, or required gas, vent, water, condensate, and control corrections make the complete repair poor value. The Westford warranty case explains the claim-documentation side of that decision.
Maintenance After Navien Heat Exchanger Replacement
Descaling addresses mineral accumulation in the water passages. It does not repair a leaking seal, acidic-water corrosion, vent or combustion defects, damaged wiring, condensate problems, or failed controls. Maintenance should follow the confirmed conditions rather than being presented as a guarantee against another failure.
Annual service is a practical review point for many tankless systems, but it is not a universal requirement to descale every unit on the same date. The exact model instructions, use, recirculation, property-specific water test, service history, and scale observed during service determine whether descaling is due. A sediment filter does not treat dissolved hardness, and treatment follows measured results rather than a town-wide assumption.
Service-plan options can support recurring inspection and records; Tankless Annual Service is a separate add-on whose scope and interval are confirmed for the installed unit. Maintenance cannot guarantee that a component will not fail. The Navien Error 110 guide covers a separate air-pressure and venting diagnosis that should not be confused with proof of exchanger failure.
Key Takeaways
- A documented Navien heat exchanger replacement should identify the exact model, part, observed condition, approved scope, and warranty boundary.
- Isolation and service valves reduce drain-down disruption, but they do not isolate gas or electricity and do not make the repair a homeowner project.
- Model-specific disassembly and reassembly replace unsafe generic screw, wiring, or gas-train instructions.
- Filters and the condensate trap can be inspected while access is open, but their condition does not prove why the exchanger failed.
- A water-side leak check and successful ignition are not the full commissioning record; gas, combustion, vent, condensate, safety, flow, temperature, and code checks still matter.
- Navien controls warranty eligibility, and exchanger-part coverage does not automatically include labor or connected corrections.
- Repair-versus-replacement and descaling decisions follow evidence, not age, town name, or a generic schedule alone.
Frequently Asked Questions
How long does a Navien heat exchanger replacement take?
With the correct part on site, usable isolation valves, normal access, and no added damage, the component work and commissioning can take roughly 4–8 on-site hours. That is a planning range, not a promise or the recorded duration of this Tyngsborough case. Diagnosis, manufacturer review, parts delivery, and scheduling are separate. Corrosion, connected damage, missing valves, vent or condensate corrections, or a failed test can extend the work or require a return visit.
Does the Navien warranty cover the part and labor?
Navien's residential heat-exchanger coverage runs 15 years for qualifying applications under the exact current written terms. Navien decides eligibility after reviewing the model, application, installation, documentation, maintenance, water conditions, and reported failure. The exchanger part, other parts, diagnosis, and labor do not all share one coverage term. Access, shipping, seals, connected corrections, and return visits are not automatically included with an approved part.
Is exchanger repair worth it, or should I replace the tankless unit?
A Navien heat exchanger replacement can make sense when the failure is confirmed and isolated, the surrounding appliance remains serviceable, the correct part is available, and the root condition can be corrected. Replacement deserves consideration when damage is broad, major faults recur, parts are unavailable, demand has changed, or connected corrective work makes repair poor value. Age and an error code do not decide the question alone. Compare the full flat-rate repair scope with a complete property-specific replacement proposal.
Will a new exchanger prevent another failure?
No repair can guarantee that another component will never fail. The best protection is to identify and correct the confirmed water, flow, venting, combustion, condensate, pressure, installation, or component condition that matters to the exact unit. The Tyngsborough source does not preserve the original failure cause, so I do not assign one after the fact. Model-specific commissioning and evidence-based maintenance matter more than a generic promise.
How often should a Navien tankless water heater be descaled?
The exact model instructions, use and recirculation, tested water conditions, service history, and scale found during service should guide the interval. Annual service can be a practical review point, but it does not mean every unit needs descaling on an identical schedule. Descaling treats water-side mineral scale and cannot correct every condition that leads to Navien heat exchanger replacement. Treatment should follow measured results rather than an assumption about Tyngsborough water.
Can I use or repair the heater while the exchanger is being replaced?
No. The appliance must remain isolated and out of normal service during this professional gas-appliance repair and until required testing supports return to service. Do not open the cabinet, connect hoses, alter venting, handle gas components, or repeatedly reset it. If there is gas odor or a suspected leak, everyone should leave, operate nothing inside, call 911 and the gas utility or propane provider from outside, and stay out until officials clear the property; because CO is odorless, a CO alarm or possible exposure, flame, smoke, or fire also means leaving, calling 911 outside, and staying out until officials clear the property.
Plan Tankless Service
Jeneral Plumbing is based in Westford, MA and serves Tyngsborough, Chelmsford, Dracut, Tewksbury, Groton, Pepperell, and other communities within its 23-town Middlesex & Essex County core. For equipment comparison beyond this case, the water-heating guide explains tank, hybrid, and tankless paths without assuming replacement is always the answer.
For regular-hours visits: an $80 dispatch fee — the cost of the visit, waived when you hire us for the work. Call (978) 392-7789 to discuss Navien heat exchanger replacement symptoms, exact unit information, and the next diagnostic step.
Written by Kris Record, Massachusetts Master Plumber, License #9628831-PL-M.
Technical review by Kris Record, Massachusetts Master Plumber, License #9628831-PL-M.
This article was drafted with AI writing tools from Jeneral Plumbing job notes and source materials, then edited before publication. AI tools did not inspect the job or validate technical conclusions.
Last updated .